 |
|
This page contains software and instructions to create and edit scene collages, as described in this paper: "Scene Collages and Flexible Camera Arrays," You may refer to the project page for more details. Note that this is research software and may contain bugs or other issues--please use it at your own risk. If you experience major problems with it, you may email us, but please note that we do not have the resources to deal with all issues. System Requirements The software requires Windows XP. Downloading the software Please click here to download the software as a zip file. After unzipping, you should see the following files: The two main applications are as follows:
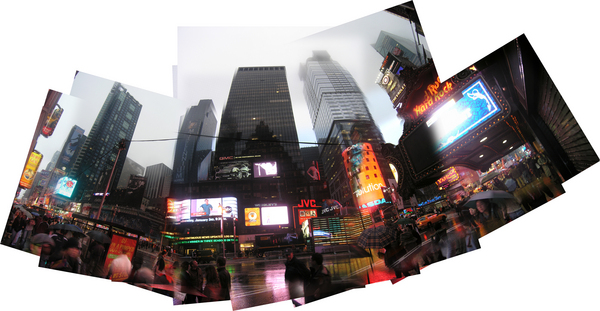
Tutorial Auto Scene Collage is easy to use. Simply run the AutoSceneCollage program and you will see the main window of Auto Scene Collage: Next we will use some of the image sets from our gallery to demonstrate how to use this software to create collages. Example 1: Atrium (Fully Automatic) To create a collage, you need to select a set of images and load them in to the software window. Click the File menu and then Open to select images as you typically do in other programs. (You can also directly drag-and-drop images from Explorer to the Auto Collage window.) Press Open and you will see your images loaded in the main window of Auto Collage as follows. The images are listed in the same order as they are selected. The check mark indicates the reference image, which is the one that does not change its size and orientation. All other images will be aligned with respect to this reference image. By default, the first image is selected as the reference image; you can change it by clicking on any of the other image names. Now from the Build menu, choose Start: This starts the automatic collage process, which can take between 2 and 10 minutes, depending on your computer's speed and memory. (On a laptop with a Core Duo 2GHz CPU and 2GB RAM, it takes about 4 minutes). During this period, the window is grayed out to let you know that it is computing: When it is done, the window will return to its normal color and every image will be marked OK. You will see the collage in a separate window: You can try the same process with other image sets from our gallery, such as the Book Store, Columbus Circle, South Street Seaport, and Time Square. Example 2: Playroom (Changing Collage Parameters) If you apply the procedure from Example 1 to the Play Room image set, you will see the following warning box after you press start: If you ignore it and press Continue, you will get a collage like this, in which some input images are missing: The missing images are indicated by "NG" in the collage window: The reason for the missing photos is that the texture on the floor in the input images is weak, and not enough features are detected there. To fix this, you can change a parameter in the collage configuration. Click on the Build menu and then Config: You will see the following configuration window box: Here, you can lower the Contrast Threshold (shown highlighted in the above image) from the default value of 0.1 to 0. Then click OK. This helps extract features on weakly textured image regions. Now, if you choose Start from the Build menu again, you will get a collage like this: This time, all images are included in the collage, but now the boy is upside down. You can change the orientation of the collage by selecting a different image as the reference image. For example, if you select image 9 as the reference image (by checking it in the main window) and build the collage again, you will get a collage like this: You can apply the same procedure (i.e., changing contrast threshold from the default 0.1 to 0) to the Church and Office datasets, and you will get collages that include all the images. For the Church example, you may want to use image 6 as the reference image. Example 3: Taxi (Collage Editing) For the taxi scene, if you apply the procedure from example 2 and select image 10 as reference image, you will get a collage like the following: While this collage includes all input images, some targets of interest are hidden in an undesirable way, such as the body of the taxi. To fix this, we provide a scene collage editor tool that allows a user to change the image layer ordering. To use the tool, you must first save the collage results created by the auto collage software by clicking File => Save Setup. Then run the SceneCollageEditor.exe program downloaded with AutoSceneCollage. Click on File => Load to load the setup file you just saved. What you see first is the collage editor window; all editing work is done here. Notice that each image lies on a different plane initially. You can use the following controls to change your view of the collage:
The first group of buttons below the reset view button allows you to change the appearance of the collage. You can toggle them to see their effects. For example, if you click Colored Layers, each image is highlighted in a different color. The second group of buttons below the reset view button is used to edit individual images in the collage. For example, if you click on Translate, you can use your mouse to move individual images. If you click on any of the X, Y, or Z buttons, you will only move along the selected direction. Similarly, you can click on Rotate and Scale buttons to adjust the orientation and size of each individual image. Getting back to our example, we can fix our hidden taxi by clicking Translate and choosing the Z translation mode. Then we select the image we need to move. The image will be highlighted in red as shown here: Now we move the image to the front: In the end, after going back to the front view (pressing the reset view button), you will see a collage like this: A Final Word About the Scene Collage Editor Please note that the scene collage editor can be used even without the setup file generated by the AutoSceneCollage program. In this case, after loading in all the images, you can move images around to create collages as you wish! |